Navigate to Send Notifications > Incident Report Notifications > Incident Report.
The application will present the Create Incident Report page.
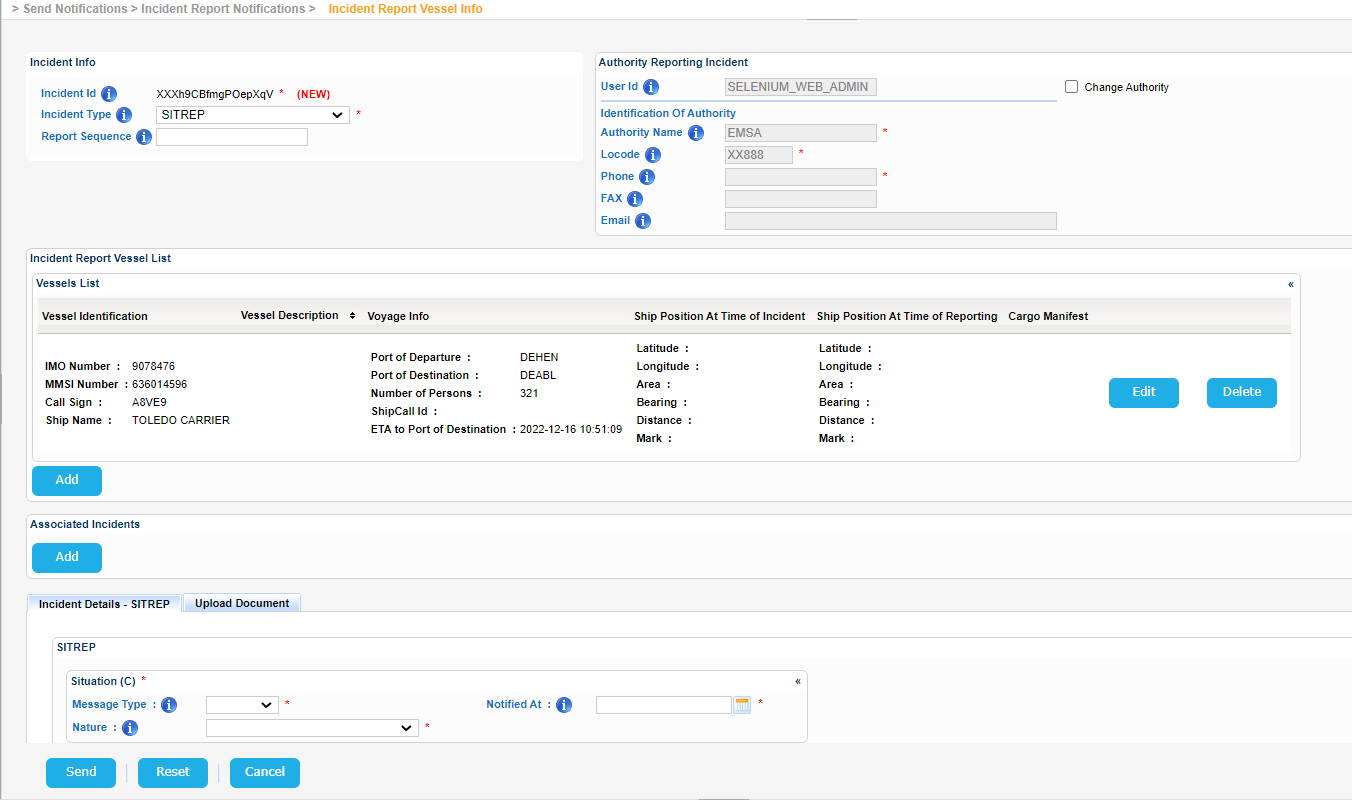
The screen contains 6 main areas that is:
- Incident Info
- Authority Reporting Incident
- Incident Report Vessel List
- Associated Incidents
- Incident Details (Adjusted according to the Incident Type selected in the Incident Info section)
- Distribution
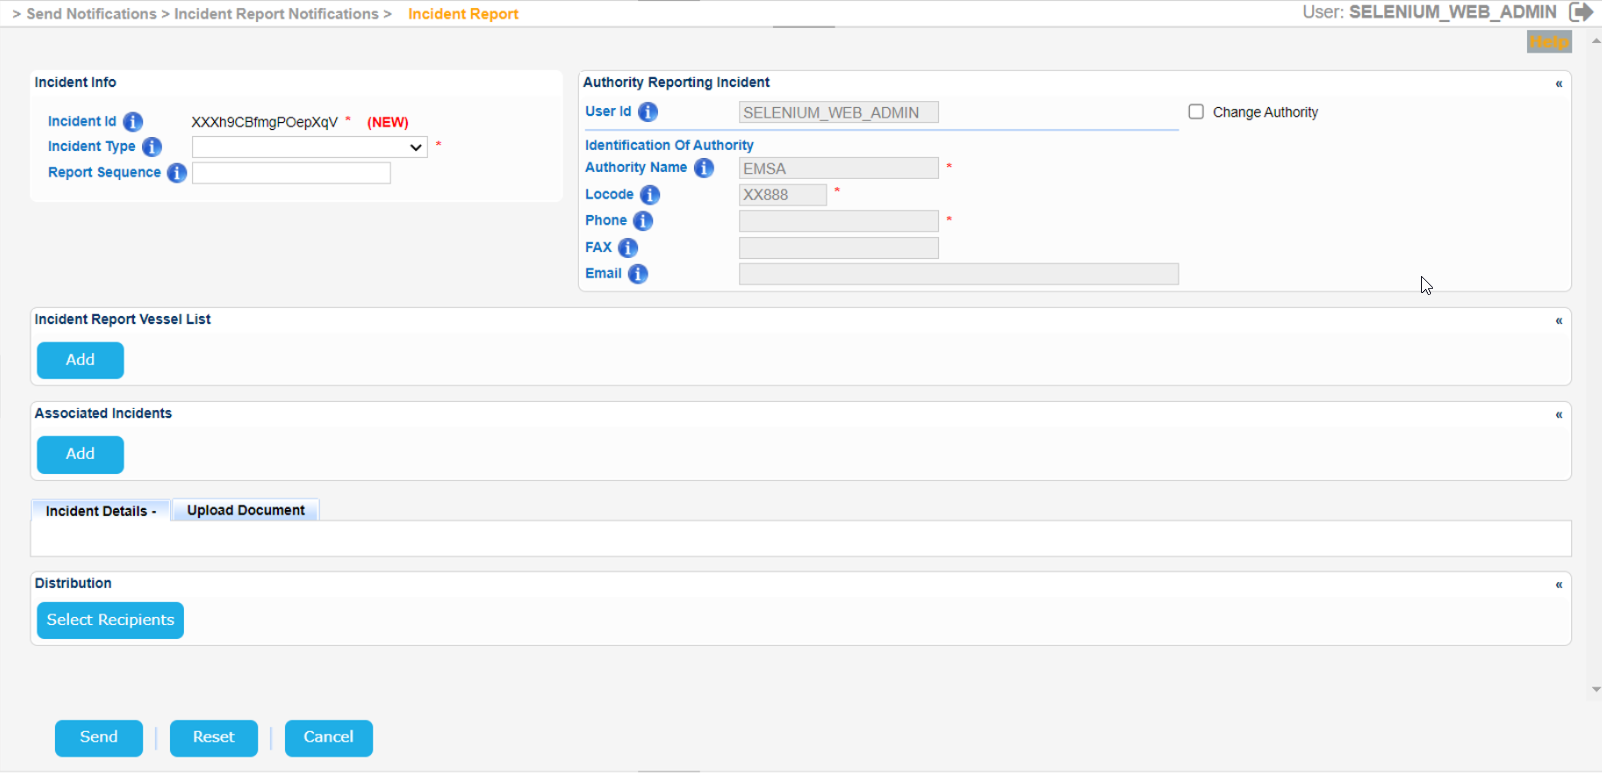 In order to successfully create an Incident Report you need to select an Incident Type and fill in the rest of the mandatory fields.
For the Vessels taking part in the Incident Report click on Add button of the Incident Report Vessel List section.
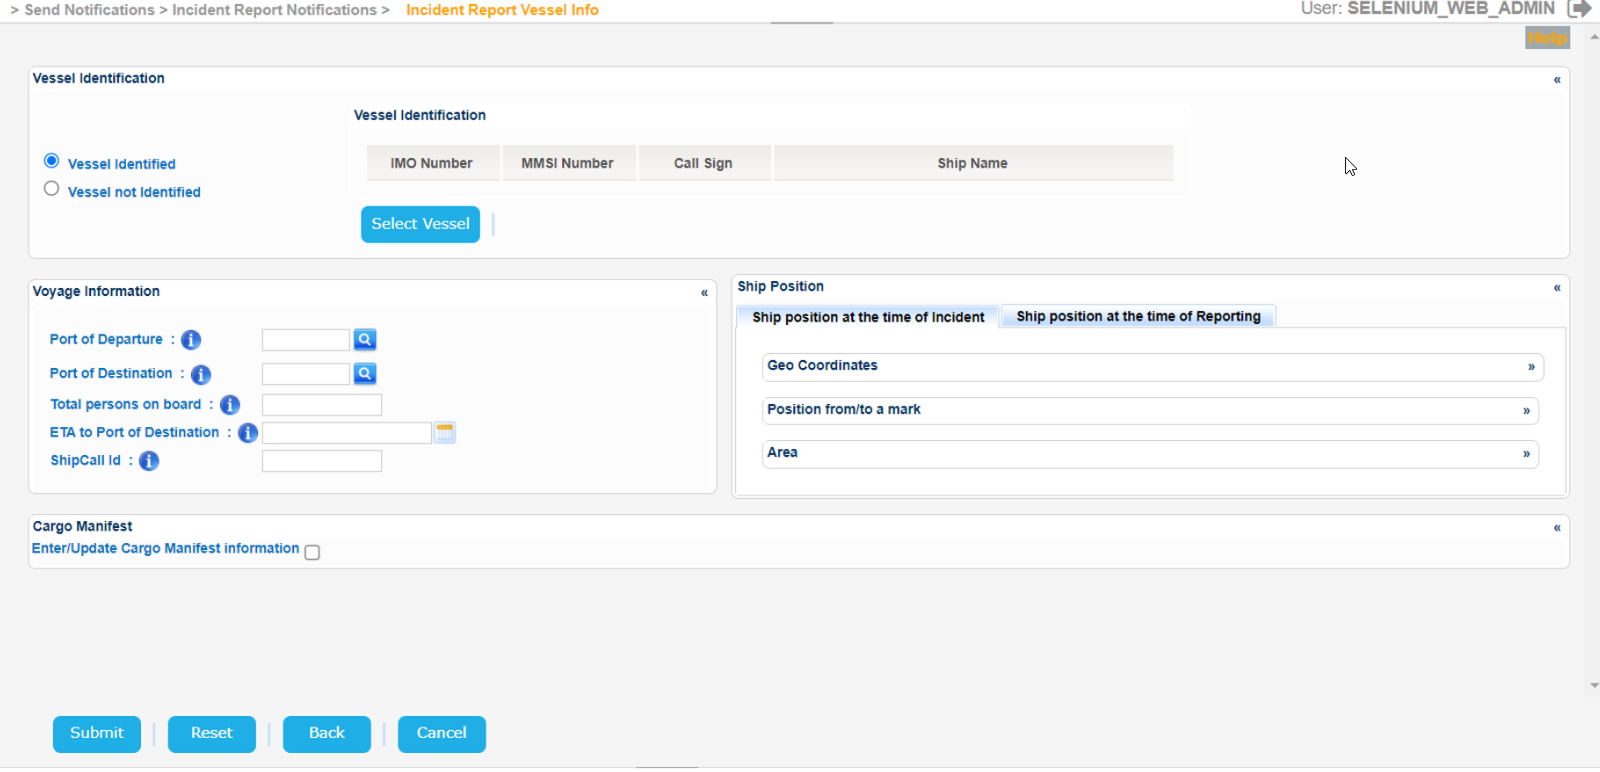
A new screen will present the Vessel search form along with a prefilled option that states that the Vessels is identified.
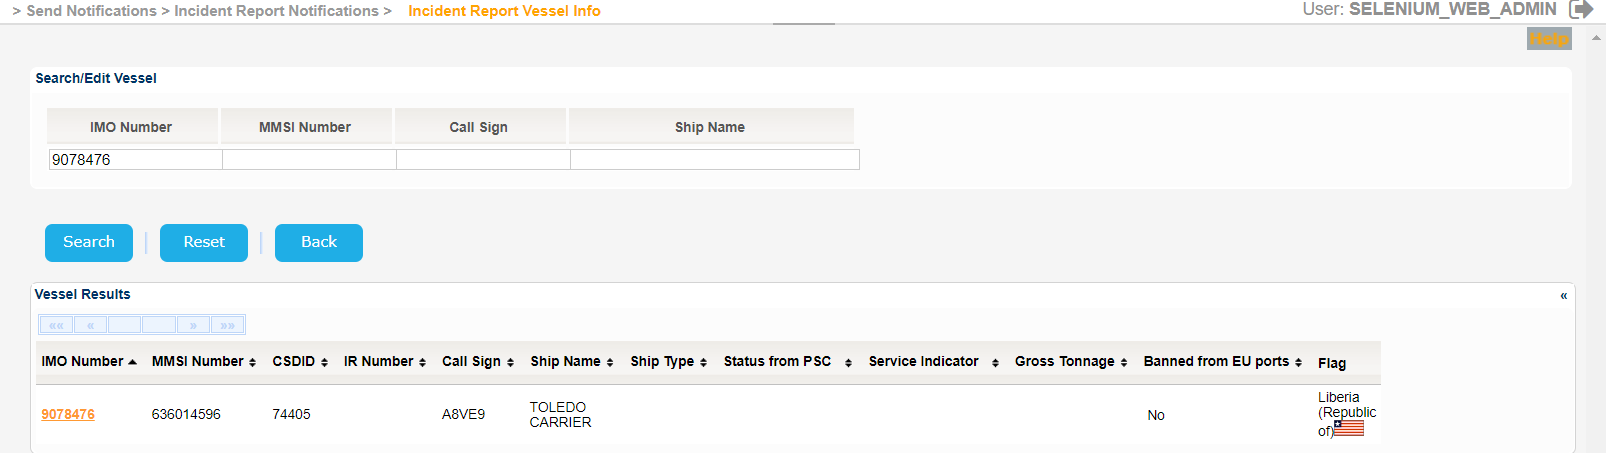
Fill in the at least one of Vessel particulars, click on Search Button and select one of the presented Vessels in the Results table by clicking on the IMO number link.
The application will present in a new screen the Vessel Identification section with the details of the selected Vessel and again the Vessel Identified option will be checked.
Should you decide that the Vessel is not identified and click on the relevant radio button, then the Vessel Identification section will be replaced by a field name Vessel Description where you need to fill in a short description of the Vessel.
Additional information can be provided for the Voyage and the actual Ship Position and the Cargo Manifest in the relevant sub-sections.
The Service Indicator and Ship Type codes and labels are provided in the attached files:


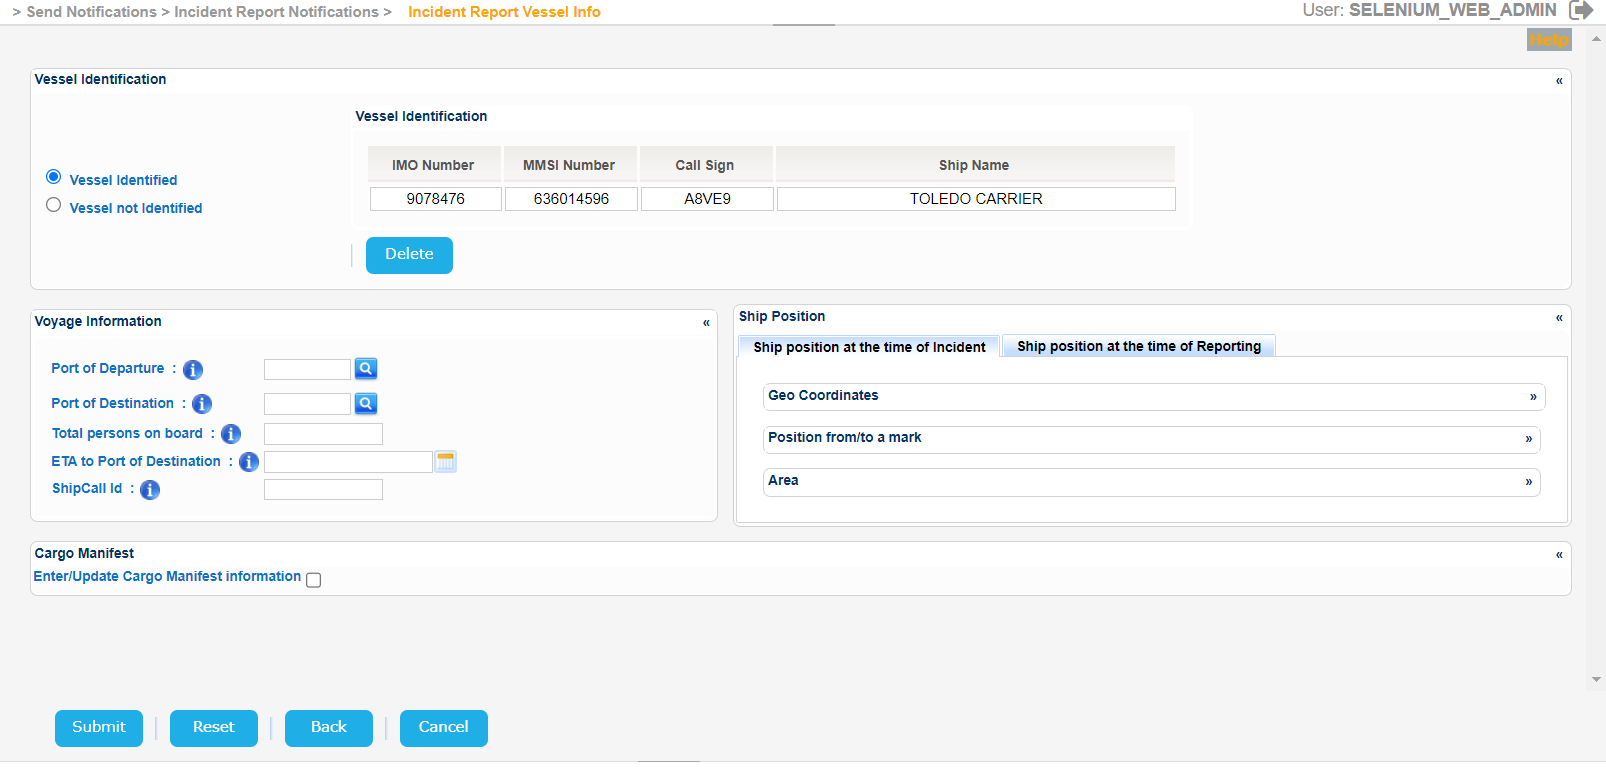
Click on Submit button and the Vessel along with the rest of the details, recorded in the previous step, will be presented in the following updated form:
Scroll down to the Distribution section and click on the Select Recipients button.
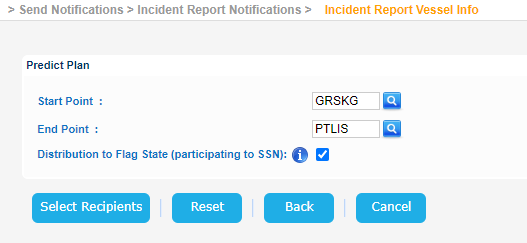
The application will present a new screen where you need to define for a start the Start and End Points.
So for a trip starting from Greece/Thessaloniki and ending in Portugal/Lisbon the relevant Predict Plan form will look like that:
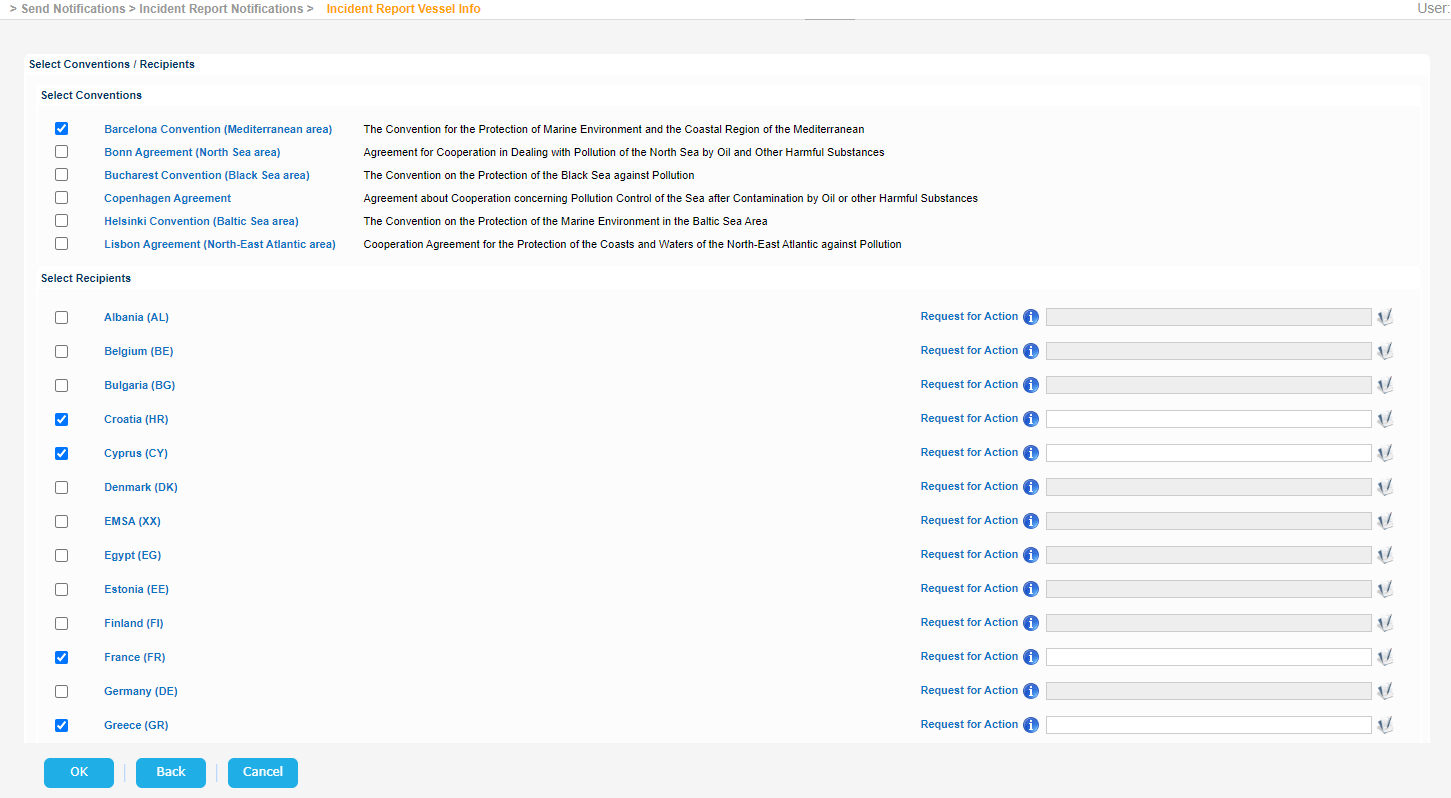
Click on Select Recipients button and a new screen will be rendered where you need to choose the recipient either as members of a selected Convention or as individual Countries.
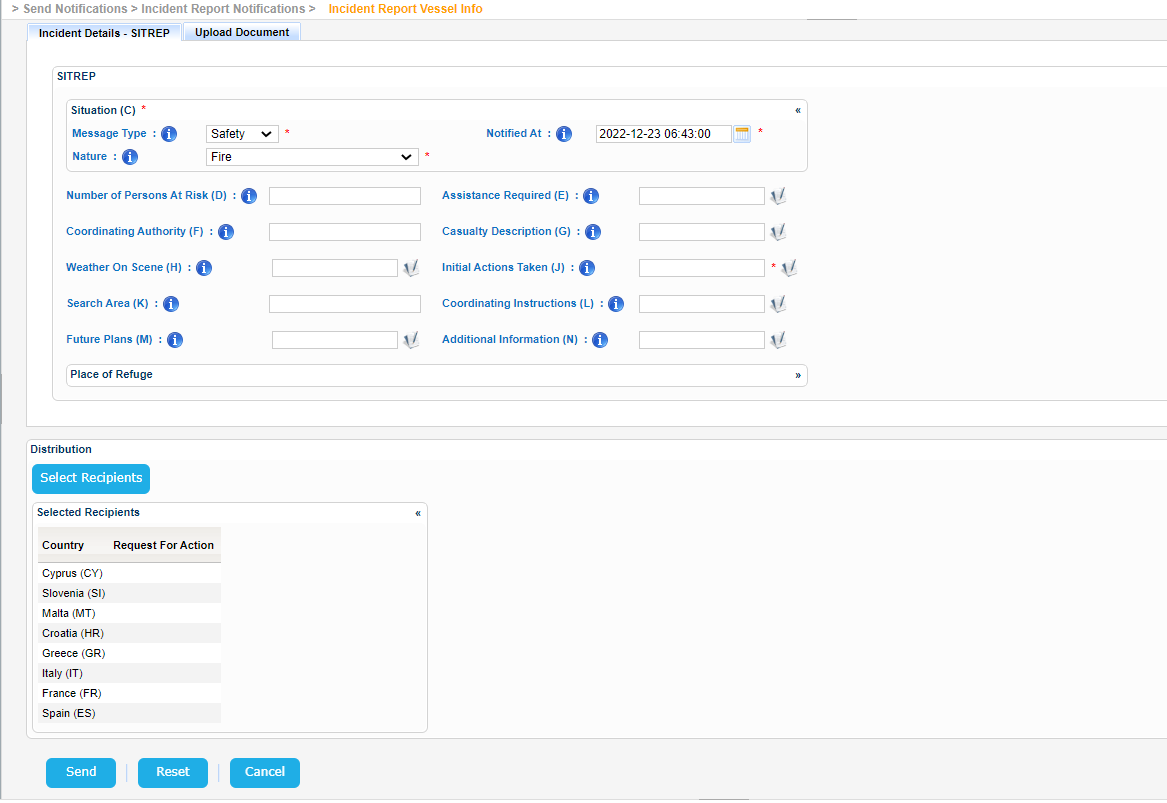
Click OK button and the selected values will be transferred in the initial Create Incident Report form:
Click on Send button.
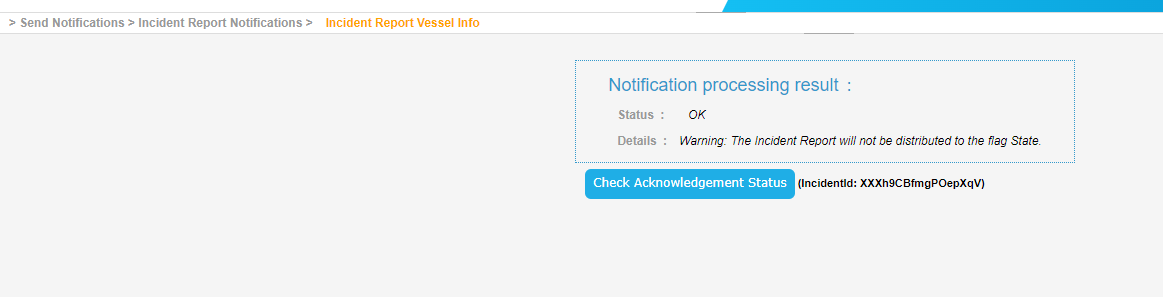
The Incident Report Notification will be sent and the application will present the following message.
While waiting for the the Distribution Acknowledgment Status the following message will be presented:
Eventually the list of the recipient countries will be presented in a table:
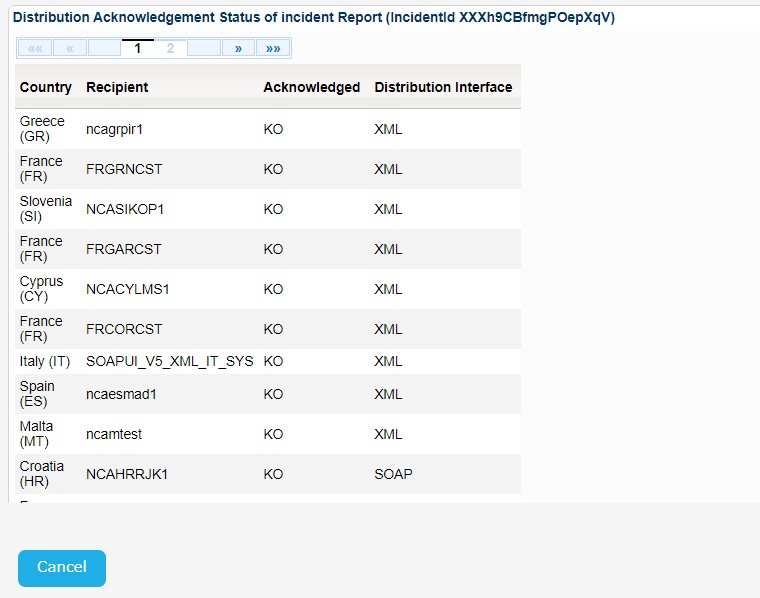
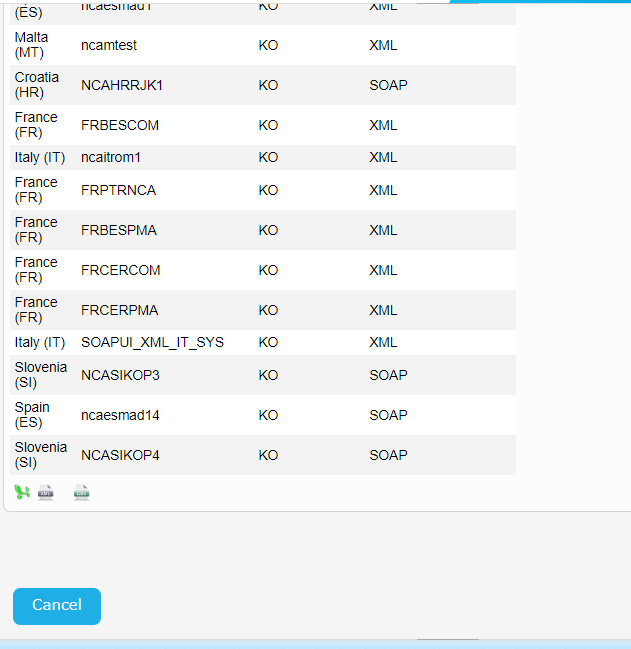
Export the Recipient Countries by clicking on the Excel, XML, or CSV option at the bottom left side on the table.
In the current version the system does not allow the use of Temporary Locations.
Therefore should you try to create a new Exemption from scratch by filling in the form a "Port LOCODE" of a temporary Location and click on Submit button the system will generate an error message.

Similarly should you click on the Search icon of the Port LOCODE field and in the presented new screen look for a "Port Name" that corresponds to a temporary Location this will not be available for selection: